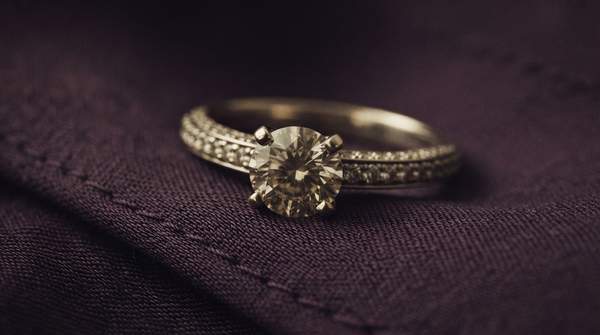
Micro-pavé is a jewelry setting technique in which dozens—sometimes hundreds—of tiny diamonds, each typically under 1.2mm in diameter and often weighing less than 0.01 carats, are set so closely together that the metal holding them nearly disappears. The result, as Washington Diamond describes it, is "a surface that looks completely paved with light." But the seamless sparkle is not magic; it is the product of a demanding hand-setting discipline with its own vocabulary—graver cuts, ajours, fishtail settings, French and Swiss beadwork—mastered through years of bench work under a microscope. Learning that vocabulary is how a collector learns to see.
The Dazzling World of Micro-Pavé: An Introduction
The word pavé comes from the French for "paved," the same word used for cobblestone streets, and the metaphor is exact: stones laid edge to edge until the underlying surface reads as one continuous shimmer. Diamondrensu explains the mechanism plainly. Every minute diamond is placed into the ring and secured with mini prongs or beads of metal, each stone held snugly in place. Because the stones are so small and so tightly arranged, no single diamond announces itself; instead the eye registers texture, a field of light rather than a collection of gems.
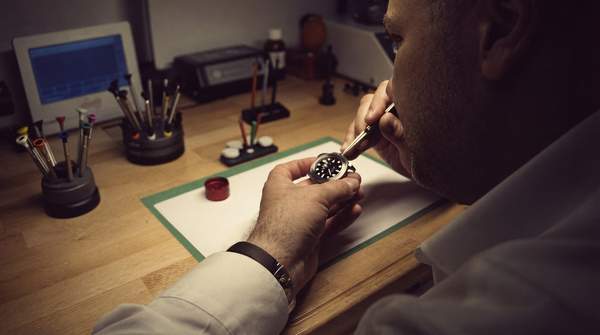
What elevates micro-pavé above ordinary beadwork is precision at a scale the naked eye cannot police. According to the jewelry-tutorials guide, the technique is best described as the highly precise setting of very small diamonds using a microscope. It came of age around the early seventies, when cutters perfected the ability to produce uniform stones from 0.5mm to 1.2mm in diameter, each carrying the full complement of 57 facets. The craft, in other words, waited for the cutting technology that made it possible.
Micro-Pavé vs. Traditional Pavé: A Collector's Visual Guide
The distinction between micro-pavé and traditional pavé is one of degree, but the degree changes everything. The jewelry-tutorials guide notes that micro-pavé uses smaller stones than traditional pavé and is a relatively modern technique, with rows of small diamonds no larger than 1.2mm across. Washington Diamond's comparison puts it concretely: micro-pavé features smaller stones, less visible prongs, and a more refined look than standard pavé.
The most telling difference is metal visibility. In traditional pavé, the metal framework between stones is part of the design's rhythm; in micro-pavé, prongs are measured in microns. Jewellers Academy observes that when micro-pavé is done well, very little metal is visible and the surface appears almost completely covered in gemstones. Look for that near-invisibility: if your eye catches bright ribs of metal between rows before it catches the stones, you are looking at pavé, not micro-pavé. The intended effect is sometimes described as a velvety or suede-like texture—light without visible seams.
The Micro-Pavé Craft: An Explanatory Model
The clearest map of what master-level hand-setting actually involves comes from the advanced pavé and micro-setting curriculum at the New Approach School for Jewelers, a professional training program whose listed topics read as a glossary of the craft. Mapped against the observable stages of making a piece, the techniques sort into three phases—preparing the work, cutting the metal, and setting and finishing the stones.
| Stage of the craft | Named techniques and tools | What it accomplishes |
|---|---|---|
| Layout & preparation | Holding tips and tricks; framing and layouts; proper microscope tuning; work fixturing; graver preparation | Secures the piece immovably and plans the stone arrangement before any metal is cut |
| Cutting & shaping | Graver cut; ajours (square and honeycomb); cutting; bright cut | Carves seats and openings in the metal where the tiny diamonds will sit |
| Stone setting & finishing | Beadwork and patterns (French and Swiss styles); fishtail styles; micro-prong cluster pavé; mixed setting techniques; bead and semi-bezel; micro fishtail; finishing and polishing | Raises the beads that lock each stone in place and refines the surface to its final sparkle |
Two details from the curriculum reveal how demanding the discipline is. Admission requires submitting photographs of one's best hand-cut bead or pavé setting—explicitly excluding CAD or cast prongs—along with instructor approval, and students must already know how to use a microscope. The named techniques assume competence before they begin.
The Foundation of Sparkle: Framing and Layout Techniques
Before a single diamond is set, the work is largely architectural. The curriculum's preparation topics—holding, framing and layouts, microscope tuning, work fixturing, graver preparation—describe a phase whose entire purpose is control. A piece that shifts by a fraction of a millimeter mid-cut ruins a row; hence the fixturing and the holding techniques. Framing and layout determine the stone arrangement, the rhythm of rows that will ultimately produce the "tightly woven with no separation between each row" effect described in the jewelry-tutorials guide. And graver preparation matters because the cutting tools themselves—the small, hardened steel implements that push and carve metal—must be honed before they can shape seats for stones under 1.2mm wide.
Precision in Miniature: Graver Cuts and Beadwork Patterns
The cutting stage is where the metal is prepared to receive the stones, and it carries the craft's most distinctive vocabulary. The graver cut is the fundamental stroke; ajours—openings in the metal, worked in square and honeycomb patterns—create the architecture of light and shadow beneath and between stones. The curriculum's inclusion of bright cut belongs to this shaping phase, associated with refined metal work around the set stone.
Then comes beadwork, the signature of the setter's hand. Jewellers Academy describes the underlying move: the jeweller raises tiny grains of metal using a graver to hold stones in place. The professional curriculum distinguishes beadwork patterns in French and Swiss styles—two named schools of arranging and forming those grains, each with its own visual grammar—and also teaches micro-prong cluster pavé in the same two styles. To a trained eye, the pattern of the beads is a signature; to a collector, uniformity of that pattern across an entire band is one of the surest signs of a master hand.
Advanced Artisanship: Fishtail Setting and Ajours
The curriculum reserves its most advanced names for techniques that fuse structure and ornament. Fishtail setting—taught both as a general style and in a "micro fishtail" variant—produces a distinctive patterned cut around the stone, and its inclusion alongside mixed setting techniques, bead and semi-bezel work suggests a setter who can blend methods within a single piece. Ajours, worked in square and honeycomb forms, remove metal to let light travel through the setting itself, so the sparkle is engineered not only on the surface but within it.
One point of craft practice deserves an honest footnote: sources differ on how the stones are seated. Diamondrensu describes diamonds placed into tiny drilled holes, while the jewelry-tutorials guide states that in micro-pavé the diamonds are set directly into solid metal rather than a pre-drilled hole, leaving the underside of the piece smooth and solid. Both descriptions appear in the trade's own literature, and the difference likely reflects different setters' workflows—evidence that even the fundamentals of this craft are practiced in more than one school.
Appreciating Quality and Ensuring Longevity: A Collector's Care Guide
Knowing the vocabulary changes what you can perceive. When you examine a piece of micro-pavé—ideally under a jeweler's loupe—look for the things the techniques exist to produce: metal that recedes almost to invisibility between stones, beads raised uniformly in a consistent pattern, rows woven tightly with no visible separation, and light that reads as continuous texture rather than discrete gems. Washington Diamond notes the technique's common uses in engagement ring bands, halos, and eternity bands, precisely the pieces where a continuous ribbon of sparkle is the point.
Recognizing Master Craftsmanship: What to Look For
When evaluating micro-pavé jewelry, prioritize pieces that exhibit minimal metal visibility, a seamless surface of sparkle, and consistent beadwork, because these are the observable outcomes of the hand-setting techniques—the graver cuts, ajours, and French or Swiss beadwork—that distinguish master-level work from standard pavé. The measurable indicator is the visual consistency and near-invisibility of metal between stones, along with uniform beadwork patterns, upon close inspection with a jeweler's loupe. Run your eye slowly along one row and then across several: on a well-set piece, the pattern should hold without interruption, and the metal should never compete with the light.
Sources
- The Art of Micro Pavé: Unveiling Its Intricate Beauty — Washington Diamond
- What Are Micro Pave Diamonds: Exploring Their Dazzling Appeal — Diamondrensu
- Pavé Bead Setting Technique — Jewelry Tutorials
- A Jeweller’s Guide to Micro Setting — Jewellers Academy
- Advanced Pavé & Micro Setting - New Approach School for Jewelers